Yoga with Ahsa
Home
About
Offerings
Ahsa on YouTube
Ahsa on Insight Timer
In-Person Classes
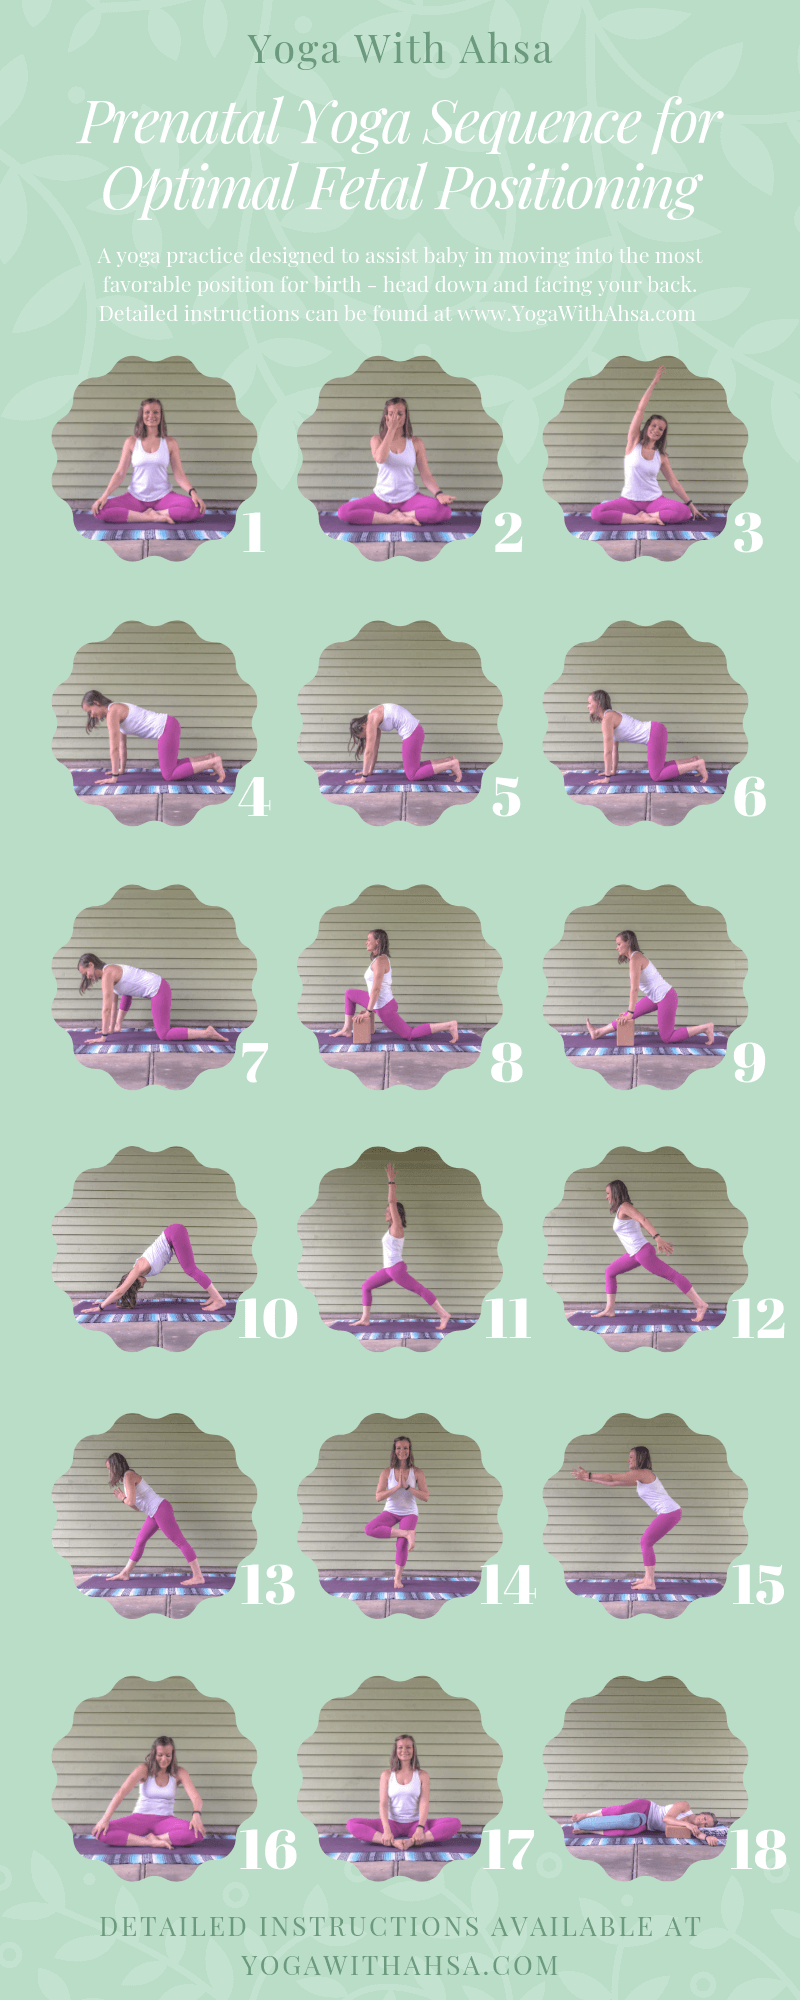
Prenatal Yoga
Yoga Sequences
Contact
Newsletter
Home
About
Offerings
Ahsa on YouTube
Ahsa on Insight Timer
In-Person Classes
Prenatal Yoga
Yoga Sequences
Contact
Newsletter
Search by typing & pressing enter
YOUR CART
 RSS Feed
